Oregon Light Oregon Light

How to Create a Dramatic LED Ring Waterfall Effect in 2026?

Time:2026-11-04 Author:Henry
0%

A dramatic LED ring waterfall is not just a bright circle behind falling water. It is a balance of flow, spacing, color, and timing. James Turrell, the acclaimed light artist, is often quoted as saying, “I don’t make things with light, I make things with perception.” That idea offers a useful starting point: viewers notice contrast and movement, not simply the number of LEDs.

How to create a dramatic waterfall effect with LED rings? Begin with the water pattern. A steady, even sheet usually reveals a ring’s outline more clearly than scattered jets. Choose outdoor-rated, waterproof fixtures, and plan safe, professionally reviewed electrical connections before installation. Test the ring spacing and brightness with a small mock-up. Even a few centimeters can change whether the water glows or hides the light.

Color and movement need restraint. Slow fades can make falling water feel deep; rapid changes may turn it into visual noise. Try cool white for a crisp edge, then add one saturated color for emphasis. Keep the control system synchronized with the pump, and check the effect in daylight and after dark. It may not look perfect at first. Water bends light unpredictably, and reflections can wash out a carefully chosen color. That is worth testing, not guessing. This guide explores the design choices, equipment, setup, and troubleshooting behind a waterfall effect that feels vivid, controlled, and dependable.
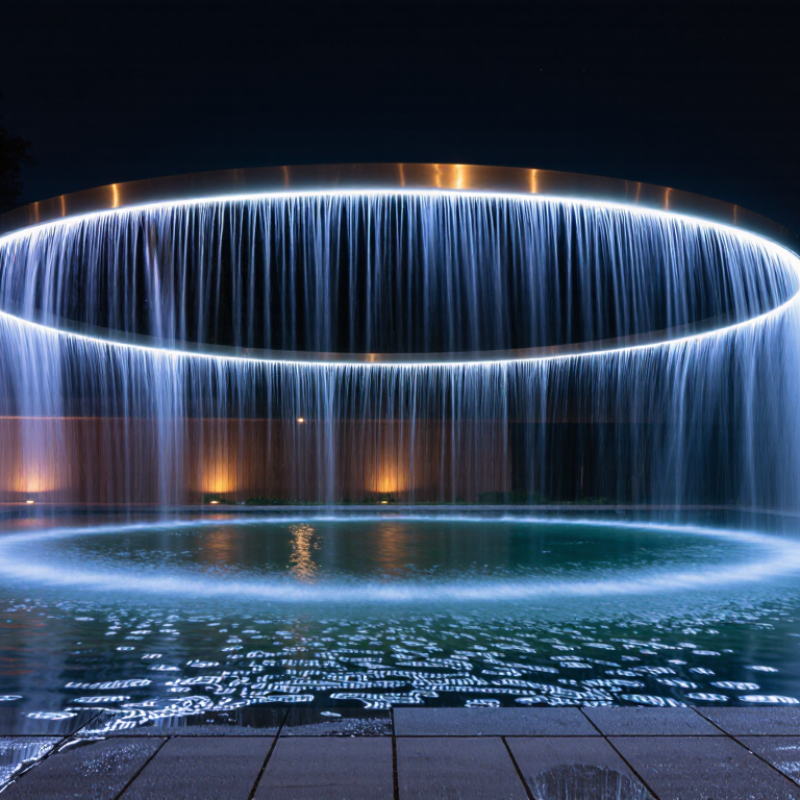
How to Create a Dramatic LED Ring Waterfall Effect in 2026?

Understand the LED Ring Waterfall Effect and Its Visual Principles

An LED ring waterfall effect uses timed light segments to make color appear to descend around a circular frame. Each segment switches on slightly after the one above it, creating a flowing sequence rather than a static glow. The illusion depends on spacing, timing, and contrast. Too much speed can blur the motion; too little can make it look like separate dots. Keep the ring’s background dark, and test the sequence from the audience’s usual viewing distance.

Brightness is not perceived evenly across colors. The CIE’s 2019 report, The Basis of Physical Photometry, places peak photopic sensitivity at 555 nanometers, so green light can appear brighter than red at similar radiant power. That matters when balancing colors across the ring. The U.S. Department of Energy’s Energy Saver guidance says LEDs use at least 75 percent less energy than incandescent lighting and can last up to 25 times longer. Still, efficiency does not guarantee a convincing effect. Diffusers, viewing angles, and camera shutters can change what people see. A little unevenness may remain. Test it in the actual space.

Plan the Ring Layout, Waterfall Path, and Lighting Zones

Start with the ring in plan view, then check how it reads from the main viewing area. A ring that looks balanced from above may feel cramped beside a wall or seating. Mark its inner and outer edges with tape, and leave clear access for cleaning and maintenance. Small detail, big difference. Keep the waterfall’s landing area inside the basin, with enough room to limit splash onto nearby paths.

Map the water path before placing lights. A short spillway creates a crisp, defined curtain; a wider edge produces a softer sheet, but may need careful flow adjustment. Test the pump and water level before finalizing the layout. Even flow matters more than dramatic height. Watch for wind, uneven edges, and water striking the ring frame. These can make the effect look messy, and some fixes may require repositioning the outlet.

Divide the lighting into zones: the ring, the falling water, and the basin. Aim ring lights inward or along the rim to avoid glare in viewers’ eyes. Place waterfall lights where they reveal moving water without shining directly toward seating. Use fixtures rated for the installation’s wet conditions, and have electrical connections planned by a qualified professional. Set each zone to dim independently. A bright ring can overpower a delicate cascade; the best balance may take a few evening adjustments.

How to Create a Dramatic LED Ring Waterfall Effect in 2026?

Plan the ring layout, waterfall path, and lighting zones with a timed brightness sequence.

Example 60-second lighting cue at 5-second intervals. Values show commanded LED brightness from 0% to 100%; stagger each zone’s peak to create a descending waterfall path around the ring.

Choose LEDs, a Controller, Power Supply, and Weatherproofing

A dramatic LED ring waterfall starts with the right light, not the brightest light. Use outdoor-rated LEDs with a consistent color temperature, and check how they look against the actual water at dusk. Diffused lenses soften harsh points; closely spaced pixels create smoother animation. For a balanced effect, keep the ring’s inner edge visible without letting individual LEDs dominate the falling water.

Choose a controller that supports the LED type, refresh rate, and animation speed you need. Test a short section before installing the full ring. Small details matter. Calculate the total load from the LEDs, then select a power supply with sensible spare capacity. Long runs can lose voltage, so plan power injection points and appropriately sized, fused branches. Leave room for error. Keep the supply and mains connections away from splash zones; have a qualified professional handle mains wiring.

Water finds weak seams. Use outdoor-rated cable, sealed connectors, and enclosures suited to the location, while remembering that a weather rating does not make a submerged connection safe. Make drip loops so water runs away from connectors, and avoid trapping condensation inside sealed boxes. Inspect seals after installation and again after seasonal temperature changes. It is easy to focus on the animation and underestimate maintenance; access for cleaning and repairs matters just as much.

How to Create a Dramatic LED Ring Waterfall Effect in 2026? — Choose LEDs, a Controller, Power Supply, and Weatherproofing

A practical design reference for a circular, individually addressable LED installation. Example calculations use a 3 m ring with 30 pixels per metre.

Design Dimension Recommended Specification Example or Calculation Installation Notes
LED type Individually addressable RGB pixels or strip, compatible with the controller’s data protocol 12 V addressable LEDs; verify the pixel IC and wiring before purchase Addressable pixels allow moving chases, falling-light patterns, and color gradients around the ring.
Pixel density and ring size Choose pixel density to balance visual smoothness, cost, and power demand 3 m circumference × 30 pixels/m = 90 pixels Measure the ring’s actual path length. For a circle, circumference is approximately 3.14 × diameter.
Waterfall animation Use a moving color segment with a fading tail and adjustable speed Start with a 10–20% brightness limit and a slow-to-medium chase speed Test animation direction and speed at night. Lower brightness can reduce glare and power use.
Controller Use a programmable addressable-LED controller with a compatible data output and sufficient pixel capacity For 90 pixels, select a controller rated for at least 90 pixels; extra capacity allows later expansion Connect controller ground to LED power-supply ground. Check whether the data output needs a level shifter for the selected LEDs.
Maximum LED load Calculate from the LED manufacturer’s maximum power per pixel At 0.3 W/pixel: 90 × 0.3 W = 27 W; at 12 V, 27 W ÷ 12 V = 2.25 A Actual consumption varies by pixel design, color, and brightness. Use the specified maximum value for power planning.
Power supply Regulated 12 V DC supply with at least 25% capacity above the calculated maximum load 27 W × 1.25 = 33.75 W minimum; a 12 V, 4 A (48 W) supply provides headroom Use a supply with the correct output voltage and suitable outdoor protection or place it in a properly rated enclosure.
Power injection and protection Plan wiring for the total current; use appropriately rated cable, connectors, and a fuse near the supply For a 3 m ring, consider feeding power at more than one point if brightness or color becomes uneven Follow the LED maker’s wiring limits. Keep data and power polarity correct, and do not exceed cable or connector ratings.
Weatherproofing Choose an LED assembly and connectors with an ingress-protection rating suited to the exposure IP65 products are generally protected against dust and water jets; IP67 products are rated for temporary immersion under specified test conditions Seal cut ends and cable entries as directed. A product’s rating applies only when installed with its specified seals and connectors.
Outdoor safety and testing Use a suitable protected power circuit and keep mains-voltage work compliant with local electrical rules Test the full ring at low brightness before final mounting Keep low-voltage connections accessible for inspection, provide strain relief, and disconnect power before servicing.

Design figures are example estimates, not universal ratings. Confirm LED current, controller compatibility, environmental limits, and wiring requirements from the selected product specifications.

Build the Structure and Program Flowing Light Patterns

A rigid ring starts the effect. Use a level metal frame, evenly spaced supports, and a translucent diffuser so individual points soften into a continuous ribbon. If water runs nearby, keep connections above splash zones, add drip loops, and use sealed, low-voltage components. Test it dry. A small alignment error can make the waterfall appear to climb.

Map each LED section as a step in a circular sequence. Program a cool-white highlight to travel downward, then fade each segment into blue over several beats. A short pause at the bottom gives the motion weight. Include the controller and power supply in your load estimate.

The U.S. Department of Energy reports that LEDs use at least 75% less energy than incandescent lighting; that comparison supports efficient component choices, though actual project savings depend on the full system.

A mistake worth questioning: brighter is not always more dramatic. Start with modest output, then adjust contrast and speed while watching the ring from the intended viewing distance. Use a diffuser test before fixing every strip in place. The first chase may feel too much like a loading bar. Slow it down, vary the fade, and check whether water reflections obscure the pattern. DOE’s Energy Saver guidance also notes LEDs can last up to 25 times longer than incandescent bulbs, but heat, moisture, and installation quality affect real-world service life.

Install, Test, and Refine the Effect Safely

How to Create a Dramatic LED Ring Waterfall Effect in 2026?

Mount the ring above the falling water, not inside its path. Keep the power supply and connections away from splashes, and use equipment specifically rated for the installation’s wet conditions. Check the rating and the manufacturer’s immersion limits; an IP rating is not a guarantee for every setup. Have a qualified electrician check the supply, protective device, and local requirements before energizing the system. Leave a drip loop in each cable. Small details matter.

Test with water flowing before adjusting brightness. Watch for flicker, hot connectors, water tracking along cables, or light bouncing harshly off the basin. Shut power off before touching or repositioning anything. The U.S. Department of Energy’s 2022 Solid-State Lighting R&D Opportunities report discusses LED package efficacy near 200 lumens per watt in advanced development. That figure describes packages, not finished fixtures; optics and heat reduce real-world output. So choose brightness by viewing the complete effect, not by chasing a specification. A common miss is aiming the ring directly at the viewer. Try a slight downward angle, then adjust spacing until the falling strands catch light without washing out. Take notes. Recheck after the system warms up; my first setting would not always be the final one.

FAQS

How does an LED ring create a waterfall effect?

Light segments switch on in sequence around the ring. Timed delays make the color appear to descend.

What makes the motion look smooth?

Balance segment spacing, timing, and contrast. Too much speed blurs the flow; too little shows separate dots.

Which colors work well together?

Try a cool-white highlight that fades into blue. Green can appear brighter than red at similar light output. Test the balance in person.

What helps individual LEDs look like one ribbon?

Use a rigid, level frame with evenly spaced supports. A translucent diffuser softens the points into a more continuous band.

How should I test brightness and viewing angles?

Start with modest brightness and watch from the audience’s usual distance. Reflections and camera shutters can change the effect. A little unevenness may remain.

How can I keep the installation safer near water?

Mount the ring outside the falling water’s path. Keep connections above splash zones, use suitable wet-location equipment, and add drip loops.

Does an IP rating guarantee protection from water?

No. Check the equipment’s rating and immersion limits for the actual setup. Ask a qualified electrician to review the supply and protective devices.

What should I check during a live test?

Run the water and look for flicker, hot connectors, cable tracking, or harsh basin reflections. Switch off power before adjusting anything.

How can I refine the light pattern?

Try a slight downward angle and a short pause at the ring’s bottom. Take notes and recheck after the system warms up. My first setting might not be right.

Conclusion

Creating a dramatic LED ring waterfall effect begins with understanding how light, spacing, and movement work together to suggest cascading water. Plan the ring arrangement and the path the illumination will follow, then divide the display into lighting zones so patterns can travel smoothly from one section to the next. The question “How to create a dramatic waterfall effect with LED rings?” is best answered by balancing a clear visual sequence with the dimensions and setting of the installation.

Choose LEDs, a compatible controller, and a power supply suited to the project, and protect components from moisture and outdoor conditions where needed. Build a stable structure, program flowing patterns with thoughtful timing and transitions, then install the system securely. Test each zone, check connections and brightness, and refine the animation until the movement feels continuous and convincing. Careful planning and safe testing help turn a simple ring layout into a polished, dynamic waterfall display.

Henry

Henry

Henry is a dedicated marketing professional with a profound expertise in the company's offerings. With years of experience in the industry, he possesses an impressive understanding of the market dynamics and consumer behaviors that drive success. Henry is committed to sharing his insights through......