Oregon Light
Outdoor landscape lighting can transform a dark walkway, patio, or garden bed. However, exposed cables quickly weaken that polished appearance. They catch on tools, collect mud, and may become damaged during mowing. Homeowners often ask, “How to hide messy wires for outdoor landscape lighting?” The answer begins with planning, not simply pushing cables beneath soil.
Landscape lighting designer Janet Lennox Moyer, author of The Landscape Lighting Book, has emphasized, “The best lighting is often the lighting you do not see.” That principle guides this topic. A reliable installation should conceal cables while keeping every connection accessible for inspection. Mark each fixture location first. Then measure the cable route with gentle curves instead of sharp bends. Shallow trenches, protective conduit, landscape staples, and carefully placed mulch can create a cleaner finish. Never bury a connection without using a suitable, weather-rated enclosure.
Safety matters more than perfect appearance. Use low-voltage equipment approved for outdoor conditions, and follow the transformer manufacturer’s instructions. Check local electrical requirements before digging. Call before you dig. A cable hidden beneath fresh mulch may look finished today, yet roots, erosion, or future gardening can expose it later. That is where many guides become too confident.
Real installations need maintenance space. Leave a little slack near fixtures. Photograph buried routes before covering them. Test the lights at night, when glare and dark spots become obvious. Some solutions will still need revision. This guide will examine practical concealment methods, common mistakes, and the small details that keep outdoor lighting discreet, accessible, and dependable.
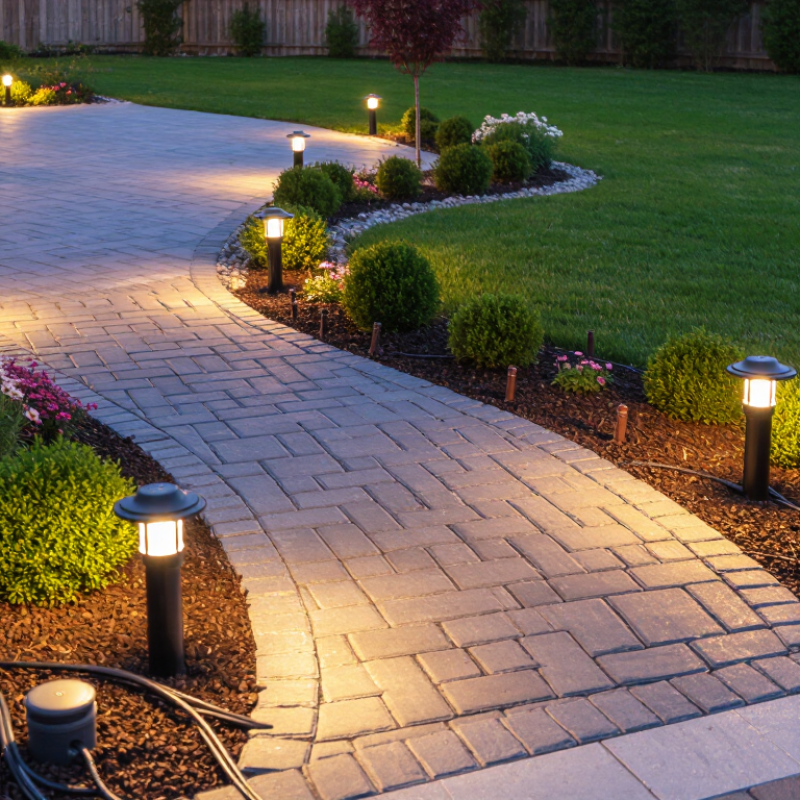
How to Hide Outdoor Landscape Lighting Wires?
Assess the Landscape Lighting Layout and Wire Paths
Start with a map. Mark trees, steps, walls, beds, outlets, and proposed fixtures. I measure each route before digging, then sketch the wire path with branch lengths. This exposes unnecessary loops and potential voltage-drop problems. The U.S. Department of Energy reports that LED lighting uses at least 75% less energy and lasts up to 25 times longer than incandescent lighting. Efficient fixtures still need careful planning. A poorly balanced layout can create dim zones and visible cables.
Keep wire paths near bed edges, beneath mulch, or beside hardscape borders. Avoid tree roots, drainage channels, and areas likely to receive future digging. Cross lawns only when necessary. Use shallow, smooth curves instead of sharp turns. Leave accessible slack near connections, but do not coil large wire bundles underground. The Illuminating Engineering Society’s exterior-lighting guidance emphasizes controlled distribution, glare management, and maintainable installations. That principle applies to wire planning too.
I usually place a temporary marker at every fixture. Then I walk the property after sunset. Look again. A path that seems hidden at noon may show clearly beside a lit path. My first layout was too tidy and ignored a mature tree’s roots. That mistake mattered. Confirm branch loads, calculate voltage drop, and follow local burial and electrical requirements before covering the wire. Photograph the finished route with measurements from permanent features. Future repairs become much easier.
Choosing a suitable concealment method protects both appearance and electrical performance. Begin by tracing the cable path beside fences, paving edges, or planting beds. For shallow garden lighting, bury low-voltage cable in a narrow trench, usually 15–20 centimeters deep. Follow the local electrical code, not guesswork. NFPA 70, Article 411, addresses low-voltage lighting installations and requires suitable wiring methods for the environment.
Use conduit where roots, sharp stones, or future digging may damage the cable. PVC conduit works well beneath walkways, while flexible conduit helps around tight corners. Leave a little slack near each fixture. Tight wires can pull loose when soil settles. DOE Energy Saver guidance reports that LED lamps use at least 75% less energy and last up to 25 times longer than incandescent lamps. That efficiency reduces transformer demand, but it does not excuse poor cable protection. I once saw hidden wiring fail because mulch covered a connector. The lesson was simple: conceal the wire, but keep every connection accessible, elevated, and sealed for outdoor use. Avoid burying connectors directly in wet soil. Test voltage at the farthest fixture before closing the trench. Small losses can appear after several fittings, especially on long runs. Recheck the layout after heavy rain, because tidy installation can still shift.
| Concealment Method | Typical Installation Depth | Best-Suited Areas | Protection Level | Installation Difficulty | Main Advantages | Important Considerations |
|---|---|---|---|---|---|---|
| Shallow Trenching | Approximately 5–10 cm below the soil surface, where permitted by local requirements | Flower beds, planting borders, and low-traffic garden areas | Moderate | Easy | Quick to install, inexpensive, and easy to access for future repairs | Use outdoor-rated low-voltage cable and cover the wire completely with soil or mulch. Avoid areas subject to frequent digging. |
| Deeper Trenching | Approximately 15–30 cm, adjusted for local codes, soil conditions, and surface use | Lawns, walkways, exposed garden edges, and areas with regular maintenance | High | Moderate | Reduces the risk of damage from aeration, edging, routine gardening, and foot traffic | Check for underground utilities before digging. Deeper installation may be unnecessary in protected planting beds. |
| PVC or Flexible Conduit | Usually installed in a shallow or deep trench according to the location and local requirements | Driveway crossings, lawn edges, rocky soil, and areas exposed to tools or animals | Very High | Moderate | Adds mechanical protection and creates a more organized cable route | Use conduit and fittings suitable for outdoor or underground applications. Leave an accessible route for cable replacement where practical. |
| Mulch or Gravel Cover | Wire is placed beneath the covering material, commonly within a shallow trench | Mulched beds, rock gardens, decorative borders, and areas without regular digging | Moderate | Easy | Blends with the landscape and allows relatively simple access during maintenance | Keep the cable below the surface and away from sharp edging tools. Replenish displaced mulch or gravel when necessary. |
| Under Paving or Hardscape | Inside conduit beneath the paved surface; depth depends on the surface construction | Patios, pathways, steps, retaining walls, and driveway crossings | Very High | Difficult | Provides a clean appearance and protects wires from gardening equipment and weather exposure | Plan the cable route before installing the hardscape. Conduit should be positioned to avoid sharp bends and allow future access. |
| Along Fences or Structures | Mounted discreetly or placed in protected conduit along the structure | Fence lines, deck edges, walls, pergolas, and raised planting areas | Moderate to High | Easy | Minimizes digging and keeps wiring away from lawn equipment and planting work | Use weather-resistant fasteners and route cables neatly. Prevent abrasion at corners, joints, and entry points. |
| Behind Landscape Edging | Placed just behind the edging and covered with soil or mulch | Curved borders, planting beds, and paths with permanent edging | Moderate | Easy | Hides the wire while maintaining a clear and consistent lighting layout | Do not pinch or cut the cable with metal edging. Leave enough slack near each fixture for repositioning and maintenance. |
| Decorative Rock or Plant Cover | Wire is concealed beneath loose decorative elements or dense, non-invasive planting | Rock gardens, ornamental beds, and locations where trenching is undesirable | Low to Moderate | Easy | Useful for temporary layouts and preserves the existing soil structure | The cable can be exposed when rocks shift or plants are moved. Inspect the route periodically and avoid placing heavy objects directly on the wire. |
Outdoor lighting wires look cleaner when they disappear beneath the garden surface. The reliable method starts with careful trenches, narrow channels, and protective conduits. Mark each fixture location before digging. Call the appropriate utility-location service first. Never assume an empty-looking area is safe.
A trench about 15 to 20 centimeters deep can protect low-voltage cable in many garden areas, but local requirements may differ. Use a flat-bottomed trench where possible. Remove sharp stones that could press against the insulation. Run the cable through weather-resistant conduit, especially beneath walkways or near edging tools. Leave a small service loop beside each fixture. This allows future adjustments without pulling the entire cable run.
Keep bends gentle. Tight corners can make cable installation frustrating. I once planned a beautiful straight route, then discovered tree roots blocked it. Rerouting took longer than expected. A flexible channel would have helped.
For shallow planting beds, conceal the conduit beneath mulch, soil, or removable edging. Avoid burying connections directly in wet ground. Place approved, sealed connections inside accessible enclosures.
Test every light before closing the trench. Cover the conduit with fine soil first, then replace the surface carefully. Take photographs of the route before backfilling. Future repairs become much easier.
Hiding outdoor landscape lighting wires begins with a route, not a shovel. Sketch each fixture, transformer, walkway, and planting bed before installation. Keep cables beneath mulch, turf edges, or shallow planting zones. Avoid sharp bends and areas likely to receive regular digging. The U.S. Department of Energy reports that LED lighting can use at least 75% less energy than incandescent lighting, but efficient fixtures still need protected wiring.
Use cable rated for outdoor, low-voltage burial applications. Place it inside flexible conduit where roots, edging tools, or lawn equipment may cause damage. For direct burial, follow the cable manufacturer’s depth instructions and local electrical requirements. The 2023 National Electrical Code includes specific rules for underground wiring methods and protection. Local authorities may apply stricter requirements.
Mark the cable path with small stakes during installation. Photograph the route before covering it. Then add a few inches of sand or fine soil around the wire. This reduces pressure from stones. Leave a small service loop near each fixture, but do not create loose coils that collect water. I have seen neatly hidden wires fail because a gardener cut through an unmarked corner. That mistake is easy to repeat. Test every light before replacing soil, mulch, or sod. Secure exposed sections along hardscape edges with outdoor-rated clips, keeping connectors elevated and sealed. Some installations look perfect on day one, yet settle later. Recheck them after heavy rain and seasonal ground movement.
After concealing outdoor landscape lighting wires, test the entire system before restoring the area. Turn off the power, then inspect each connection for loose terminals, exposed copper, or trapped insulation. Confirm that every wire remains inside suitable protective conduit where soil, stones, or gardening tools may damage it.
Restore power and test the lights at dusk. This makes uneven brightness easier to notice. Walk around the garden and check each fixture from several angles. Look for flickering, delayed starts, dim lamps, or sections that remain dark. A voltage tester can help identify weak connections, but it should be used according to its instructions. Keep water away from temporary electrical connections. Safety matters more than speed.
I usually leave the system running for twenty to thirty minutes. Warm connections can reveal problems that appear normal at startup. One installation looked perfect at first, but a buried connector failed after several minutes. That mistake taught me to test before covering everything. Do not rush. If the lights work properly, replace soil in thin layers and avoid pulling the wires. Press the soil gently around the conduit, then add mulch or small stones without blocking drainage. Mark the cable route with a simple sketch or weather-resistant marker. Future digging becomes less risky. The restored ground should look natural, not freshly repaired. Check the lights again after heavy rain or the first garden maintenance session.
Test the lighting system before covering the cable route. The chart shows typical voltage readings measured at each lighting zone after installation. Readings close to the 12-volt supply indicate that the connections and concealed wiring are working properly.
After confirming stable readings, turn off the power, place the low-voltage cable inside a shallow protected trench, restore the soil and mulch, and retest every fixture.
A trench around 15 to 20 centimeters deep protects many low-voltage garden cables. Local rules may require different depths. Follow cable instructions and local electrical requirements. Never guess.
Use weather-resistant conduit where roots, walkways, edging tools, or lawn equipment could cause damage. Flexible conduit helps around awkward corners. It also makes future replacement easier.
Mark every fixture and sketch the complete cable route. Contact the appropriate utility-location service first. An empty-looking patch may still hide underground services.
Make the trench as flat as possible. Remove sharp stones from the bottom and sides. Add fine soil or sand around the cable. Small details matter.
Keep connections out of wet soil. Use approved, sealed enclosures that remain accessible. Along hardscape edges, secure exposed cable with outdoor-rated clips. Keep connectors elevated.
Leave a small service loop beside every light. It allows minor adjustments and future repairs. Avoid loose coils that can collect water. Too much slack creates new problems.
Test every fixture before closing the trench. Check the system again after replacing soil, mulch, or turf. Heavy rain and ground movement can expose weak areas.
Mark the route with small stakes during installation. Photograph the cable path before backfilling. Include trees, walkways, and fixture locations in the images. My original route once failed around tree roots, so plans need flexibility.
Planning how to hide outdoor landscape lighting wires begins with mapping the lighting layout, identifying the shortest and safest wire paths, and considering existing plants, walkways, drainage areas, and future maintenance needs. The question “How to hide messy wires for outdoor landscape lighting?” can be answered by selecting a concealment method that suits the landscape, such as shallow trenches, discreet channels, protective conduits, or careful placement beneath mulch, soil, edging, or decorative features.
Before installation, prepare clean trenches or protected routes that prevent wires from being exposed, damaged, or tightly bent. Lay the cables neatly, secure them along the planned path, and leave enough slack near each light for adjustments and repairs. After connecting the system, test every fixture during both daytime and nighttime to confirm proper operation and positioning. Finally, refill trenches, replace mulch or soil, and restore plants, stones, and other landscape elements so the wiring remains hidden while the outdoor area looks natural and well maintained.
