Oregon Light
Replacing an aging fiber-optic pool light with LED lighting is not always a simple bulb change. A fiber-optic system usually sends light from a dry, remote illuminator through a bundle of fibers to the pool. An LED retrofit may replace only the illuminator, or require a different fixture and compatible components. The right choice depends on the existing equipment, the condition of the fiber bundle, and the manufacturer’s specifications.
The U.S. Department of Energy reports that LEDs use at least 75% less energy and can last up to 25 times longer than incandescent lighting. Those figures provide useful context, but they do not guarantee the same savings for every pool retrofit: the original fiber-optic source may use a different lamp and power supply. Check the equipment label. Photograph the illuminator, wiring, and fiber connections before buying parts.
How to replace an old fiber optic pool light with LED? This guide will walk through identifying the system, choosing a compatible LED option, and planning the installation. Pool electrical work deserves care. Turn off power at the breaker, follow the product instructions, and consult a qualified pool electrician when wiring or water-rated components are involved. One detail can be easy to miss: a bright new illuminator cannot repair damaged or poorly routed fibers. Replace only what the system actually needs.
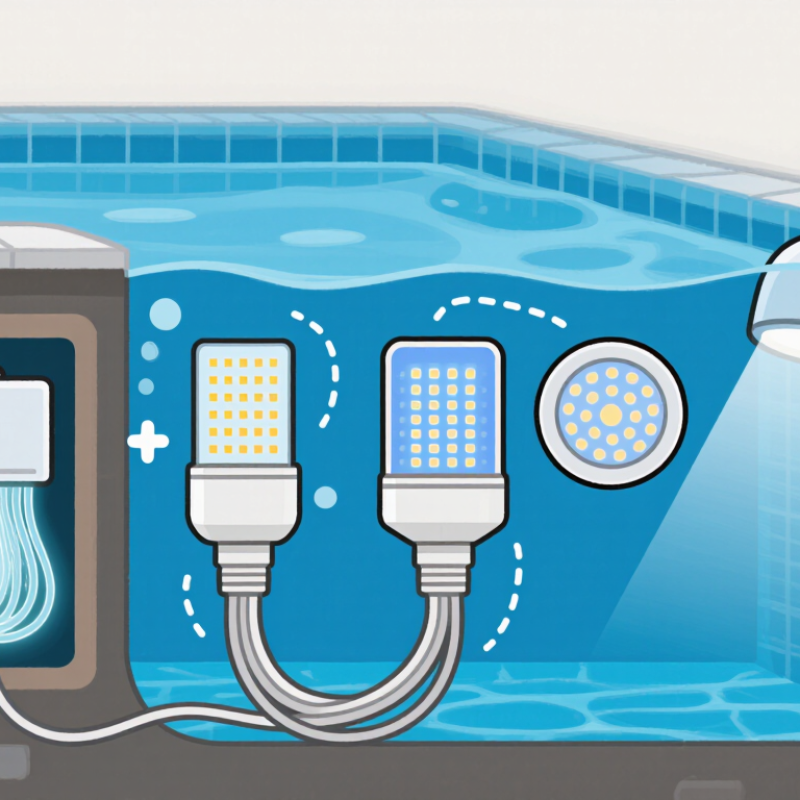
Before choosing an LED, locate the system’s light source. Fiber-optic pool lighting usually has a dry illuminator box near the equipment area, with thin fiber strands running to pool-wall or floor fittings. The strands carry light, not electricity. Look for the box, its lamp or LED module, ventilation openings, and the number and condition of the fibers. Check whether the current effect is white, color-changing, or both. A cloudy lens or damaged strand can make a new source seem weaker than it is.
Match the replacement to the illuminator’s dimensions, power supply, heat limits, and control method. Do not assume a standard pool LED that mounts in a wet niche will fit a fiber-optic system; these are different arrangements. The U.S. Department of Energy’s Energy Saver guidance says LEDs use at least 75% less energy and last up to 25 times longer than incandescent lighting. That comparison is general, not a guaranteed saving for every pool illuminator. Measure the enclosure and photograph its labels before ordering. Small details matter. I would also inspect the fiber ends, since replacing the source alone may not fix dim or uneven light.
In a typical fiber-optic pool lighting system, a remote illuminator sends light through fiber-optic cables to the pool. Check the existing illuminator’s model and specifications before selecting an LED replacement; compatibility varies by system. Confirm the actual setup on site, since installations differ.
Before replacing an old fiber optic pool light, shut off power at the circuit breaker, not only at the wall switch. If the circuit has a lockout device, use it and attach a clear warning. Confirm the power is off with a properly rated voltage tester. A dark control panel is not proof. Keep the equipment area dry, clear towels and stored chemicals away, and make sure you have steady lighting. The light source may sit away from the pool, so trace its cable carefully before moving anything.
Tips: Take a photo of the existing connections and label cables before disconnecting them. Keep screws and small parts in a tray. Never handle electrical parts with wet hands.
Set out the replacement instructions, insulated tools, and a clean cloth before opening the equipment housing. Check for cracked insulation, corrosion, or water inside the enclosure; these are reasons to stop and seek a qualified electrician. Pool-light wiring can be less obvious than it looks, especially in older installations. I might be tempted to hurry once the breaker is off, but that is exactly when a second check matters. Do not enter the pool or open a submerged light niche as part of this preparation. If you cannot confidently identify the circuit or verify isolation, leave the work area untouched until a professional can inspect it.
Switch off the pool-light circuit at the breaker before opening the old illuminator. Confirm the power is off with a suitable tester, and keep the work area dry. Take a clear photo of the cable connections before disconnecting them; a quick reference can prevent confusion later.
Remove the illuminator cover and loosen the cable restraints without tugging on the fiber bundle. Ease each cable free, keeping its original route and order where possible. Fiber strands can kink or crack under sharp bends. Go slowly. If the housing is corroded, damp inside, or difficult to open, stop and have a qualified pool technician assess it.
Inspect the cable ends under bright light. Look for cloudy surfaces, dark spots, fraying, crushed sections, or tight bends near the old unit. Wipe dust away with a clean, dry, lint-free cloth; do not use solvents or scrape the fiber face. A little discoloration may be hard to judge, and I would not assume every dim cable is damaged. Compare the strands’ condition and confirm that the replacement LED illuminator accepts their size and arrangement before reconnecting them. If a cable is cracked or moisture has reached electrical parts, leave the repair to a professional.
Replacing the old illuminator starts with checking compatibility, not matching the housing by eye. Confirm that the new LED unit accepts your fiber bundle’s diameter and connector style. Compare its light output and color controls with the pool’s existing setup. A mismatched port can leave some fibers dim. That detail is easy to miss.
Switch off power at the breaker and verify the circuit is de-energized before opening the dry-side enclosure. Keep the illuminator away from splashes, and mount it where air can circulate. Heat needs an exit. Feed the fiber bundle into the correct port without forcing it. Avoid tight bends, which can reduce brightness or damage fibers. A small curve is fine; a sharp crease is not. Secure the bundle with the supplied fitting, then connect the electrical supply exactly as the unit’s instructions specify. Use the required weather-rated enclosure and ground-fault protection. If wiring details are unclear, have a qualified pool electrician complete that part.
Before closing the housing, check that the fibers sit evenly and no strands are pinched. Restore power briefly and test each lighting mode. Look at the pool from several angles, since uneven color can be more obvious underwater. If the light flickers or stays weak, turn power off again and inspect the connector and supply voltage. I would not assume the old setup was wired correctly just because it worked. Verify it.
With the LED light source installed, restore power only after every connection is secure and all covers are back in place. Keep hands and tools dry. If wiring or the junction box is wet, damaged, or unfamiliar, stop and ask a qualified pool electrician to inspect it. Pool lighting combines water and electricity; guessing is not worth the risk.
Reset the circuit’s GFCI according to its instructions, then switch the light on from a dry location. Check that the LED source starts steadily and sends light through the fiber cable to the pool fitting. Look for flickering, unusual buzzing, a tripped GFCI, or a dark spot at the lens. Test briefly, and do not run any component longer than its instructions allow. A small detail is easy to miss: the light source may be bright while a loose fiber connection leaves the pool dim. Turn power off before any adjustment. Recheck the connections only when they are safe to access. If the light still fails, note what happens and have a professional test the circuit rather than repeatedly resetting it.
Turn off the circuit breaker, not just the wall switch. Verify the circuit is off with a properly rated voltage tester.
No. A dark panel proves nothing. Use a voltage tester.
Keep the area dry and clear. Set out insulated tools, replacement instructions, and a clean cloth. Store screws in a small tray.
Photograph the connections and label the cables. Trace the cable carefully, since the light source may be away from the pool.
Stop if you find cracked insulation, corrosion, water in the enclosure, or wiring you cannot identify. Do not guess.
Restore power only after connections are secure and every cover is back in place. Keep hands and tools dry.
Reset the GFCI as instructed, then switch on the light from a dry location. Check for steady light through the fiber cable.
Watch for flickering, buzzing, a tripped GFCI, or a dark pool fitting. A bright source can still leave the pool dim if a fiber connection is loose.
Turn power off before any safe adjustment. Note what happens and ask a professional to test the circuit instead of repeatedly resetting it. I would not rush this part.
How to replace an old fiber optic pool light with LED? Start by identifying how the existing system is arranged: fiber-optic cables carry light from a separate illuminator, so the replacement usually involves changing that unit rather than removing the cables or opening the pool wall. Choose an LED illuminator compatible with the cable bundle, available space, and electrical supply. Before beginning, switch off power at the appropriate breaker and confirm the equipment is de-energized. Keep the work area dry and gather the replacement unit and any required fittings.
Remove the old illuminator carefully, then inspect the fiber-optic cable ends for dirt, damage, or loose connections. Position and connect the compatible LED unit according to its instructions, taking care not to bend or pinch the cables. Once the enclosure is secure and the area is clear, restore power and test the lighting through its settings, checking for even illumination and reliable operation. If the wiring or equipment condition is uncertain, have a qualified pool or electrical professional handle the installation.