Oregon Light Oregon Light

2026 Top Tips How to Winterize Above Ground Pool Lights?

Time:2026-10-04 Author:Liam
0%

As winter approaches, above ground pool owners often protect the water while overlooking the lighting system. That mistake can become costly. Water trapped inside a light housing, cable channel, or junction area may freeze and expand. Cracked seals can then allow moisture inside during spring startup.

This guide explains “How to winterize above ground pool lights to prevent freezing?” using practical steps for common low-voltage systems. It covers switching off power, removing submersible fixtures, draining accessible conduits, protecting exposed connections, and storing detachable lights in a dry place. Turn off the breaker first. Never rely only on the timer. A dry towel, labeled storage bag, and weatherproof cover can make the work easier. Small details matter.

Rudy Stankowitz, a longtime pool-care educator and maintenance specialist, states, “Water left inside a light or conduit can freeze, expand, and turn a small winterizing mistake into an expensive repair.” His warning reflects a basic service reality: winter damage often begins where owners cannot see it. Still, every pool layout differs. Some lights are permanently mounted, and some manufacturers prohibit owner removal. The manufacturer’s instructions should guide the final decision. Guessing is risky. A careful inspection may reveal a worn gasket or loose connector before cold weather exposes it. This 2026 guide focuses on safe preparation, realistic maintenance, and the small oversights that can weaken an otherwise well-winterized above ground pool.
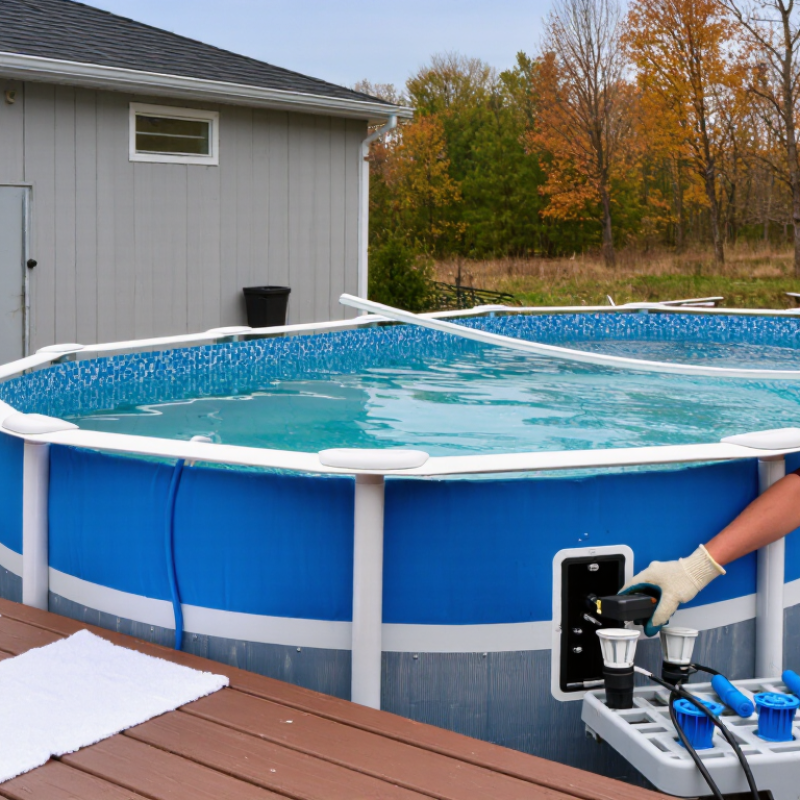
2026 Top Tips How to Winterize Above Ground Pool Lights?

Identify Your Above-Ground Pool Light System and Winter Risks

Before winterizing an above-ground pool, identify the light system installed on your wall. Some lights use a low-voltage transformer, while others connect through a sealed cord and external control box. Older systems may have hidden junctions near the pool frame. Look for the transformer. Trace the cable carefully, without pulling it. Record where the power enters and where the light sits.

Cold weather exposes weak points. Water inside a connector can freeze and expand, cracking seals or terminals. Ice movement may also strain a light mounted on a flexible pool wall. Damaged insulation creates a serious shock risk when power returns. A missing gasket is easy to overlook. So is a loose cable gland. These small defects matter.

Switch off the correct circuit before touching any light or cable. Confirm that no power remains, using a suitable tester. Follow the light manufacturer’s removal instructions, especially for submerged units. Store removable lights in a dry, padded container above floor level. Keep connectors clean, capped, and protected from rain. Do not coil cables tightly, because sharp bends can weaken insulation. If the system design is unclear, stop and ask a qualified electrician. Guessing saves minutes, but repairs can cost much more. Even a careful inspection may miss hidden moisture, so recheck every connection before spring startup.

Gather Safety Gear and Shut Down All Electrical Power

2026 Top Tips: How to Winterize Above Ground Pool Lights?

Before touching a pool light, gather certified safety glasses, insulated gloves, a voltage tester, and a dry kneeling mat. Keep towels nearby, but never use wet fabric around electrical equipment.

The National Fire Protection Association reported an estimated 32,270 U.S. home fires involving electrical distribution and lighting equipment from 2015 to 2019. Those fires caused about 470 deaths and 1,100 injuries. Pool lighting is only one part of that category, yet the figures show why small seasonal tasks deserve serious preparation.

Shut down every electrical source before removing covers or handling cables. Turn off the pool-light circuit at the breaker, then switch off the main disconnect if the wiring arrangement is unclear. Do not trust the wall switch alone.

Test the circuit with a properly rated voltage tester, and confirm the tester works before and after testing. A residual-current device or GFCI should also be tested according to its instructions. It reduces shock risk, but it does not make energized work safe. Never stand barefoot beside the pool.

Inspect the cable, junction box, conduit, and light housing

Inspect the cable, junction box, conduit, and light housing for cracks, corrosion, or trapped water. Replace damaged parts through a qualified electrician, especially when the light is hardwired. Do not pull sealed underwater fixtures apart casually. That shortcut can damage waterproof seals.

I would rather spend ten extra minutes checking the breaker label than assume it is correct. Labels can be wrong. Industry safety guidance, including NFPA 70 principles, treats de-energizing and verifying power as essential controls, not optional winter chores.

Remove, Clean, and Inspect Above-Ground Pool Lights

When temperatures fall, above-ground pool lights need more than a quick wipe. Turn off the power at the breaker before touching any fixture. Remove the light according to its installation instructions. Some fixtures twist off, while others use clips or magnets. Never pull the light by its cable. Place screws, clips, and covers in a labeled container. This simple step prevents missing hardware in spring.

Rinse each removable light with clean water, then use a soft cloth to remove algae and mineral residue. Avoid metal scrapers, which can scratch the lens and create weak points. Inspect the lens, housing, gasket, cable entry, and mounting hardware. Look for cracks, corrosion, loose connections, or trapped moisture. A cloudy lens may hide internal damage. Let every part dry completely before storage.

I once stored a light too quickly. Moisture remained beneath the seal, and the damage appeared months later. That mistake changed my winter routine. Store dry components in a padded container away from freezing temperatures. Replace worn gaskets or cracked parts before the next swim season. Do not open a permanently sealed light unless the instructions allow it. If wiring looks damaged, stop and contact a qualified pool electrician. Never improvise with unsuitable seals, tape, or replacement cables.

2026 Top Tips: How to Winterize Above-Ground Pool Lights

Remove, clean, and inspect above-ground pool lights before freezing weather. The chart summarizes the key actions in a practical winterization checklist.

Important: Switch off the circuit breaker before handling pool lights. Remove the light according to the manufacturer’s instructions, clean the lens with fresh water and a soft cloth, inspect the lens, housing, gasket, screws, and cable for damage, and store the light in a dry, protected place.

Protect Light Fixtures, Cables, and Connections During Storage

2026 Top Tips: How to Winterize Above Ground Pool Lights?

Before freezing weather arrives, switch off the pool-light circuit at its breaker. Do not rely on the wall switch alone. Confirm the circuit is dead with an approved tester, or ask a qualified electrician. Follow the light’s installation instructions, because removal methods differ. Carefully remove portable or submersible fixtures without pulling the cable. Let trapped water drain completely. Inspect each housing for cracks, cloudy lenses, loose seals, or corrosion around screws. Small damage can worsen during freezing temperatures.

Dry every fixture with a clean, lint-free cloth. Never store lights while moisture remains inside or around the gasket. Coil cables loosely, avoiding sharp bends that can break internal conductors. Keep connections clean and dry. If a connector looks discolored, damaged, or loose, do not tape over it and hope for the best. Replace damaged parts according to the equipment instructions. Label each cable before storage. That simple step prevents confusion in spring. Store fixtures in a padded, dry container away from chemicals, rodents, and direct sunlight.

Before reinstalling, inspect everything again for cracked insulation, brittle cable jackets, and corroded terminals. Replace questionable components before applying power. Reconnect fittings firmly, but avoid excessive force on plastic threads. Test the system only after the pool area is dry and all protective covers are correctly fitted. I once assumed a dry-looking connector was safe; it was not. A hidden moisture mark caused unreliable operation later. Take a slower inspection. It is cheaper than repairing avoidable damage.

2026 Top Tips: How to Winterize Above Ground Pool Lights? — Protect Light Fixtures, Cables, and Connections During Storage
Component or Area Recommended Timing Winterization Action Protection Method Inspection Criteria Storage or Winter Condition Risk Level
Power Supply Before draining or removing any light Switch off the lighting circuit and disconnect the power source. Lock or label the switch so it is not accidentally re-energized. Keep the disconnected power supply dry and protected from snow, rain, condensation, and standing water. Confirm that the light does not turn on and that no exposed energized conductors are present. Store removable power equipment in a clean, dry location above freezing whenever possible. High
GFCI Protection Before disassembly and again before spring start-up Test the ground-fault circuit interrupter using its test and reset controls, following the electrical equipment instructions. Do not bypass, disable, or replace GFCI protection with a standard outlet or adapter. The test function should interrupt power and the reset function should restore it. If it fails, stop using the light system. Keep the GFCI outlet, plug, and cover dry and accessible during winter. High
Light Fixture Housing After removal from the pool Rinse off pool chemicals and dirt with clean water, then dry the fixture completely with a soft, lint-free cloth. Place the fixture in a padded container. Avoid stacking heavy objects on lenses, seals, or mounting brackets. Check for cracks, clouding, loose screws, damaged gaskets, corrosion, or water inside the housing. Store in a dry, ventilated area away from direct sunlight, freezing moisture, and heat sources. Medium
LED Lens and Diffuser During fixture cleaning Clean with mild soap and water only. Avoid abrasive pads, solvents, and sharp tools that can scratch plastic surfaces. Wrap separately in a soft cloth or place in a protective sleeve to prevent impact and abrasion. Verify that the lens is secure, transparent, and free from chips or deep scratches that could allow water entry. Keep away from ultraviolet exposure and materials that can deform or stain plastic. Low
Submersible Cable After disconnecting the fixture Rinse and dry the cable. Coil it loosely without tight bends, kinks, or sharp loops. Use a loose hook-and-loop strap instead of wire, zip ties, or tape that could compress the insulation. Look for cuts, flattening, cracking, exposed conductors, stiff sections, or discoloration. Store in a dry area at moderate temperature. Do not place heavy equipment on the cable coil. High
Cable Entry and Strain Relief Before packing the fixture Inspect the point where the cable enters the fixture. Do not pull or carry the light by its cable. Support the fixture separately and keep the cable entry straight, without twisting or bending it sharply. Check that the strain relief is intact and that the cable is firmly secured without movement at the entry point. Protect the entry area from impact and do not allow it to rest against sharp edges. High
Plugs and Connectors Before long-term storage Disconnect only at approved connection points. Clean and dry plug surfaces before covering them. Use weatherproof covers or sealed bags only after the connectors are completely dry. Do not trap moisture inside. Inspect for bent contacts, corrosion, melted plastic, loose parts, or damaged seals. Keep connectors off the ground and protected from rodents, moisture, and freezing condensation. High
Transformer or Low-Voltage Driver After the lighting circuit is isolated Follow the equipment instructions for removal. Label input and output cables before disconnecting them. Store the unit upright in a dry, dust-free location with ventilation around it. Check for corrosion, overheating marks, cracked casing, loose terminals, or damaged cable glands. Do not wrap a damp unit in plastic or store it where condensation commonly forms. High
Mounting Brackets and Clips When the light fixture is removed Remove loose hardware and rinse away chemical residue. Keep screws and small parts together. Place hardware in a labeled, sealed container. Cushion plastic clips to prevent bending or breakage. Inspect for rust, stripped threads, distortion, missing fasteners, and weakened plastic. Store hardware dry and separate from corrosive pool chemicals. Medium
Pool Water and Chemical Exposure Before removing the light Allow recently added sanitizer or balancing chemicals to circulate according to their product instructions before handling equipment. Wear suitable protective gloves and eye protection when cleaning equipment exposed to treated pool water. Look for unusual white scale, green corrosion, brittle seals, or chemical discoloration. Never store light fixtures beside chlorine, acids, oxidizers, or other corrosive chemicals. Medium
Storage Container After all parts are clean and dry Use a rigid container with padding and enough space to prevent parts from rubbing together. Keep the container elevated, covered, and clearly labeled with the fixture location and cable connections. Confirm that no moisture, loose hardware, sharp edges, or pressure points can contact the light or cable. A dry indoor storage area is preferable; avoid unheated spaces subject to repeated condensation. Low
Spring Reinstallation Check Before returning the pool light to service Inspect every component, reconnect only with power isolated, and follow the fixture’s installation instructions. Ensure cables are routed without abrasion, pinch points, or contact with sharp pool-wall edges. Verify secure mounting, dry connections, intact seals, correct GFCI operation, and no visible cable damage. Do not energize the system if water has entered the fixture or if insulation is damaged; obtain qualified electrical service. High
Safety note: Always follow the specific installation and winter-storage instructions supplied with the light system. Electrical work near a pool should be performed by a qualified professional, especially when wiring, grounding, bonding, or buried connections are involved.

Reinstall and Test the Pool Lights Safely in Spring

2026 Top Tips: How to Winterize Above Ground Pool Lights?

When spring arrives, reinstalling above-ground pool lights deserves more care than a quick plug-in test. Turn off the circuit at the breaker before touching any cable, transformer, or mounting bracket. Keep the area dry. Remove the light and inspect its housing, lens, cable, and sealing gasket for cracks, swelling, or corrosion. A small split can allow water inside later.

Clean the contact points with a dry, lint-free cloth. Replace damaged seals instead of forcing old ones back into place. Check that the cable has no cuts or flattened sections from winter storage. I have seen a perfectly clean light fail because its connector stayed damp. That detail is easy to miss. Let every component dry fully.

Secure the light according to its installation instructions, and keep the cable away from sharp edges. Confirm that the fixture sits firmly and does not strain the cord. For underwater-rated lights, follow the manual about water coverage before restoring power. Some fixtures should never operate outside the water. Reset the ground-fault protection device, then switch on power briefly while watching for flickering, unusual heat, or a tripped circuit. Stop immediately if anything seems wrong. I used to treat a short test as enough, but a longer inspection often reveals loose fittings or weak seals. Have a qualified electrician inspect persistent faults.

FAQS

How can I identify my above-ground pool light system before winter?

Look for a low-voltage transformer, sealed cord, or external control box. Trace the cable carefully. Do not pull it. Record the power entry point and light location.

Why can winter damage pool light connections?

Water inside connectors may freeze and expand. This can crack seals, terminals, or cable glands. Ice movement may also strain lights attached to flexible pool walls.

What should I do before touching a pool light?

Switch off the correct circuit at the breaker. Confirm that no power remains with a suitable tester. If the system is unclear, stop and contact a qualified electrician.

How should removable pool lights be taken down?

Follow the installation instructions. Some lights twist off, while others use clips or magnets. Never pull a light by its cable. Label screws, clips, and covers.

How should I clean a removable pool light?

Rinse it with clean water. Use a soft cloth for algae and mineral residue. Avoid metal scrapers. They can scratch the lens and create weak points.

What parts need inspection before storage?

Check the lens, housing, gasket, cable entry, and mounting hardware. Look for cracks, corrosion, loose connections, and trapped moisture. A cloudy lens may conceal damage.

How should pool lights and cables be stored during winter?

Dry every component completely. Place removable lights in a padded container above floor level. Keep connectors capped and away from rain. Do not coil cables tightly.

What should I do if a gasket or cable looks damaged?

Replace worn gaskets or cracked parts before the next swim season. Do not improvise with unsuitable tape or cables. Seemingly small defects can create serious shock risks.

Can a sealed pool light be opened for inspection?

Only open it when the instructions clearly allow this. Otherwise, contact a qualified pool electrician. Hidden moisture can remain, even after a careful inspection.

What winterizing mistake should I avoid?

Do not store a light too quickly. Moisture beneath a seal may cause damage months later. I learned this the hard way. Recheck every connection before spring startup.

Conclusion

Preparing pool lights for winter helps prevent damage from freezing temperatures, moisture, and electrical problems. This guide explains How to winterize above ground pool lights to prevent freezing? Begin by identifying whether your system uses removable, floating, or wall-mounted fixtures, then review its specific winter risks. Turn off the circuit breaker and disconnect all electrical power before handling the lights. Wear suitable safety gear, remove the fixtures carefully, and clean away dirt, algae, and mineral buildup. Inspect lenses, seals, cables, connectors, and mounting parts for cracks, corrosion, or wear.

After cleaning, dry every component completely and store removable lights and accessories in a dry, protected location away from freezing conditions. Secure cables and protect permanent connections with appropriate weather-resistant coverings without trapping moisture. In spring, check the pool, wiring, and fixtures again before reinstalling them. Restore power only after confirming that all connections are dry, secure, and correctly positioned, then test the lights gradually for safe and reliable operation.

Liam

Liam

Liam is a dedicated marketing professional with a profound expertise in the industry, where he excels at highlighting the unique advantages of our core products. With a keen understanding of market trends and consumer needs, Liam frequently updates our company’s professional blog, providing......